Why Artificial Grass Rooftop Installation is Changing Urban Spaces
Artificial grass rooftop installation is revolutionizing how homeowners use their outdoor space, turning unused rooftops into lush, functional areas that boost property value and create perfect urban retreats.
Quick Answer for Artificial Grass Rooftop Installation:
- Assess structural capacity – Consult a structural engineer to verify weight-bearing limits
- Ensure proper drainage – Install specialized drainage systems to prevent water damage
- Prepare the surface – Clean thoroughly and protect existing waterproofing
- Install framework – Secure perimeter boards without drilling into the roof
- Lay and secure turf – Roll out grass, maintain consistent blade direction, secure edges
- Add infill for ballast – Apply weighted infill to prevent wind uplift
- Final grooming – Power broom and clean for professional finish
The latest trend in urban design is taking advantage of rooftop spaces that were once considered unusable. As one industry expert noted, “synthetic turf rooftops are the latest craze – taking advantage of areas that are on rooftops, balconies, and mezzanines is becoming more popular in the design stage.”
Rooftop installations differ significantly from ground-level projects because they must account for wind exposure, drainage challenges, and weight restrictions. The process requires specialized materials like drainage grids that can hold up to 0.576 gallons of water per square foot and fire-rated turf with ASTM E-108 Class A certification for safety.
Modern artificial grass can last over twenty years when properly installed, making it a smart investment for San Diego homeowners looking to maximize their outdoor living space. However, proper structural assessment and drainage are absolutely critical – as the research shows, water sitting beneath the turf can cause system failure and costly damage.

Pre-Installation Planning: The Foundation for Success
Think of rooftop artificial grass installation like building a house – you wouldn’t start with the roof, right? The same principle applies here. Artificial grass rooftop installation requires thorough planning that goes far beyond what you’d need for a backyard project.
Your rooftop presents unique challenges that ground-level installations simply don’t face. Wind exposure, weight restrictions, and drainage complexities all demand careful consideration before we even think about unrolling that first piece of turf. The good news? With proper planning, your rooftop can become an incredible outdoor oasis that adds real value to your property.
The planning phase involves several critical assessments. Weight load assessment is absolutely essential – we need to know exactly how much your roof can handle. A structural engineer consultation isn’t just recommended, it’s necessary for safety and code compliance. We’ll also evaluate your existing drainage systems, check the roof slope, inspect your waterproofing membrane, review local building codes, secure proper permits, and address wind uplift considerations.
For homeowners looking to create a complete outdoor change, our landscape design services can help integrate your new rooftop space with your overall property design.
Key Structural and Weight Considerations for Artificial Grass Rooftop Installation
Here’s something that might surprise you: even “lightweight” artificial grass systems can add significant weight to your roof. We’re not just talking about the grass itself – there’s a whole support system underneath that adds up quickly.
Static weight includes everything that stays put: the turf, infill materials, drainage layers, and shock pads. While artificial grass seems light when you handle it, some rooftop installations require up to 5 pounds of infill per square foot just for wind resistance. That adds up fast across a large rooftop.
Dynamic weight covers everything that moves: people, furniture, planters, and equipment. Planning to host rooftop barbecues or install outdoor furniture? We factor in these loads during our assessment. Material weight calculation helps us determine the total impact on your roof structure.
One factor many people overlook is water retention weight. During heavy rains, drainage systems temporarily hold water before it flows away. Quality systems like AirDrain can hold over half a gallon of water per square foot – that’s significant weight your roof needs to support, even if it’s temporary.
Infill weight deserves special attention because it serves double duty. Not only does it help the grass blades stand upright and feel more natural underfoot, but it also acts as ballast to prevent wind uplift. The furniture and people load calculations ensure your rooftop can safely handle gatherings and daily use.
If our assessment reveals your roof needs additional support, we’ll discuss reinforcement needs with you and your structural engineer. It’s better to address these requirements upfront than deal with problems later.
Why Drainage is the Most Critical Factor

If we had to pick the single most important factor for rooftop success, drainage wins every time. Unlike your backyard where excess water can soak into the ground, rooftops have nowhere for water to go except where we direct it.
Preventing water pooling is absolutely critical. Standing water on your roof can lead to leaks, structural damage, and create perfect conditions for mold and mildew growth. We’ve seen too many horror stories of failed installations where water sat trapped beneath the turf, causing expensive damage to both the grass system and the roof itself.
Protecting roof structure requires specialized drainage solutions. We install specialized drainage mats or geocell grids that create void spaces beneath the artificial grass. These systems allow water to flow freely across the entire roof surface to your existing roof drains.
The drainage systems we use are pretty impressive. For example, AirDrain Geocell features a 92% air void with 400 drainage notches per panel, ensuring rapid water movement. Despite its superior performance, it weighs only 3.1 pounds per 7 square feet, keeping the load on your roof minimal.
Mold and mildew prevention becomes much easier with proper drainage. When water flows away quickly instead of sitting stagnant, your rooftop stays cleaner and healthier – especially important if pets will be using the space.
Before installation begins, we thoroughly inspect your existing waterproofing membrane and repair any damage we find. We also review local building codes and secure all necessary permits to ensure your project meets regulations. Wind uplift considerations are particularly important on rooftops, where strong winds can potentially damage improperly secured installations.
This careful planning phase might seem extensive, but it’s what separates successful rooftop installations from costly failures. When done right, your rooftop change will provide years of enjoyment and add real value to your property.
The Essential Guide to Artificial Grass Rooftop Installation
This section details the hands-on process, which differs significantly from ground-level work. When we tackle an artificial grass rooftop installation, every step requires extra care and specialized techniques. The exposed rooftop environment means there’s no room for shortcuts – everything must be done right the first time.
Step 1: Surface Preparation and Protection
Getting your rooftop ready is like preparing a canvas for a masterpiece. We start with a thorough cleaning that goes beyond just sweeping up leaves. Every piece of debris, dust particle, and loose material gets removed because even the smallest pebble can create problems later.
The real detective work begins when we inspect your existing waterproofing membrane. Think of this as your roof’s raincoat – if it has even tiny holes, water will find its way through. We carefully examine every inch, looking for punctures, tears, or areas that show wear. Any damage gets repaired immediately because we absolutely cannot proceed until your roof is completely watertight.
Once we’re confident in the waterproofing, we install a protective slip sheet or underlayment over the entire surface. This acts like a security blanket, protecting your roof’s waterproofing from any potential damage during installation and shielding it from the artificial grass backing for years to come.
Step 2: Installing the Framework and Drainage System
Now comes the foundation work that makes everything else possible. We create a perimeter framework using durable materials like plastic composite boards or Trex Wood. These nailer boards will anchor your artificial grass and keep it secure against strong winds.

Here’s where rooftop installation gets tricky – we never drill into your roof. Instead, we use professional-grade adhesives like SGW Superseam Pro 444 to secure the nailer boards. This “no drill” approach is absolutely essential for protecting your roof’s waterproofing integrity. We also cut drainage slots and air escape holes into these boards so water and air can move freely.
The drainage system comes next, and this is where the magic happens. We lay down specialized drainage grids like AirDrain Geocell across your entire rooftop. These aren’t just any plastic sheets – they’re engineered with patented connectors that expand and contract with temperature changes. We carefully connect each panel, making sure the tabs extend over our nailer boards, then staple them securely in place.
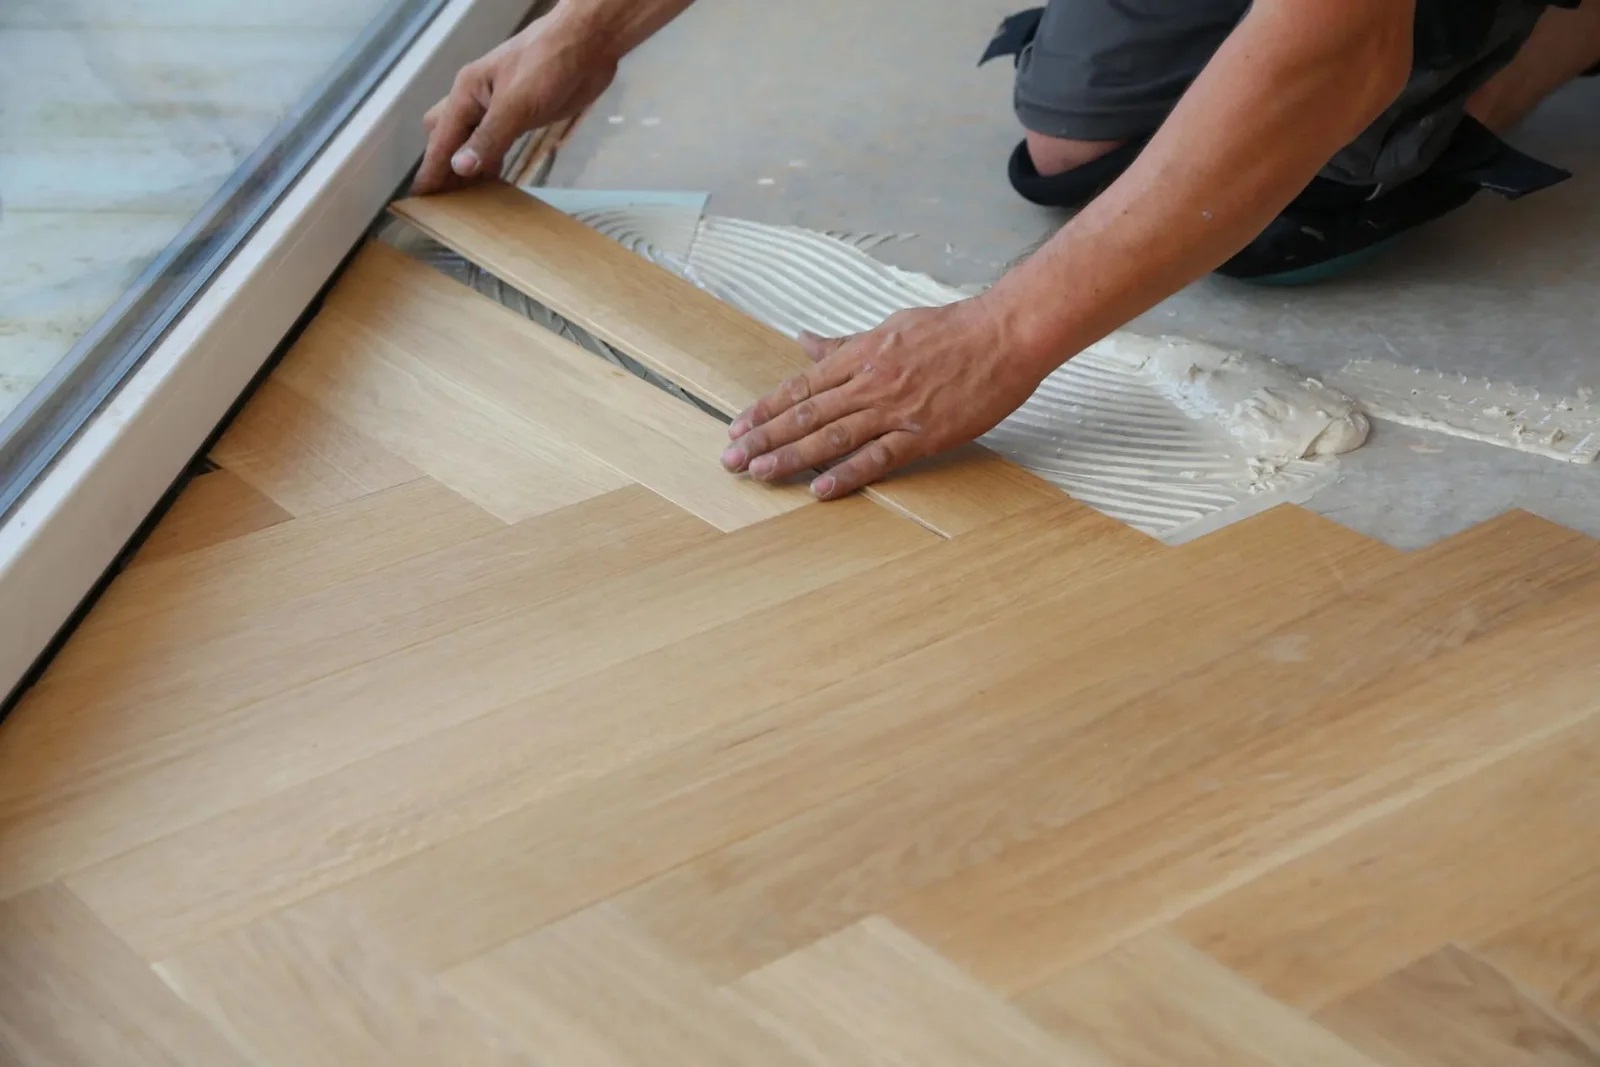
Step 3: Laying and Securing the Artificial Grass
Time for the star of the show! Rolling out artificial grass on a rooftop requires patience and precision. We carefully position each section, paying close attention to the blade direction – all the grass needs to face the same way for that perfect, uniform look.
We always give the turf time to acclimate to its new environment. Just like you need a moment to adjust when you step outside, artificial grass needs time to settle and conform to the surface temperature and shape.
Making relief cuts around obstacles takes a steady hand and sharp tools. We use a quality utility knife to ensure clean, precise edges. When we need to join pieces together, we remove the outer three tufts along the factory edge – this creates seams so invisible you’ll have trouble finding them later.
The gap between joining pieces should never exceed 1/4 inch, and we prefer keeping it closer to 1/8 inch. We apply specialized seam tape and adhesive in thin, even coats to prevent any seepage through the turf. Finally, we secure everything to our perimeter nailer boards using professional-grade adhesive and staples, creating a fortress against wind uplift.
Step 4: Applying Infill and Final Grooming
The final touches make all the difference between a good installation and a great one. Choosing the right infill for rooftop applications is crucial because it serves double duty – helping grass blades stand tall while providing essential ballast against wind.
Depending on your specific turf and local wind conditions, we might need up to 5 pounds of infill per square foot. This might sound like a lot, but it’s what keeps your beautiful new lawn from taking an unexpected flight during the next windstorm.
We spread the infill evenly across your artificial grass, then bring out our power broom to work it down into the grass backing. This process helps each blade stand vertically and creates that lush, natural appearance you’re looking for. The power brooming also ensures the infill settles properly and distributes evenly.
Our final cleanup involves removing any excess infill or debris, followed by a thorough rinse of the entire surface. This washing removes installation dust and reveals your artificial grass in all its vibrant glory. When we’re done, you’ll have a stunning rooftop oasis that’s ready to enjoy for decades to come.
Choosing the Right Materials for Your Rooftop Project
Selecting the right components is crucial for longevity, safety, and performance in an exposed rooftop environment. Not all artificial grasses are created equal, especially when they’re destined for the unique conditions of a rooftop where wind, sun, and temperature swings put materials to the test.
Comparing Artificial Grass Types for Rooftops
When choosing artificial grass for your artificial grass rooftop installation, several key features make the difference between a successful project and potential problems down the road.
| Feature | Ideal for Rooftops |
|---|---|
| Pile Height | Shorter pile (1-1.5 inches) for better wind resistance and drainage |
| Face Weight | Higher face weight (60+ oz) for durability and wind stability |
| Backing Permeability | Fully permeable backing for rapid water drainage |
| UV Resistance | Premium UV stabilizers for intense sun exposure |
| Fire Rating | ASTM E-108 Class A fire rating for safety compliance |
Pile height is particularly important for rooftop applications. Shorter grass blades create less wind resistance and allow water to move more freely across the surface. While longer pile might look more luxurious, it can catch wind like a sail and create drainage issues.
Face weight refers to the density of grass fibers per square yard. Heavier face weights not only look more realistic but also provide better ballast against wind uplift. This is especially critical on rooftops where there’s no natural ground to anchor the turf.
The backing material needs to be fully permeable to allow rapid water drainage. Some artificial grasses designed for ground-level use have partial backing that can trap water – a recipe for disaster on a rooftop.
UV resistance becomes even more important at rooftop level where there’s no shade from trees or buildings. Premium UV stabilizers protect the grass from fading and degrading under intense sun exposure.
Finally, fire rating isn’t just a good idea – it’s often required by building codes for rooftop installations. Look for turf that meets ASTM E-108 Class A standards, which means it won’t ignite easily and won’t spread flames if exposed to fire.
Essential Underlayers: Shock Pads and Drainage Grids
The layers beneath your artificial grass are just as important as the turf itself. These components work together to create a safe, comfortable, and long-lasting rooftop surface.
Shock absorption becomes crucial if your rooftop will see active use. A quality shock pad provides cushioning underfoot, making the space more comfortable for walking, playing, or exercising. This is especially important if children will be using the area.
Fall safety is another key benefit of shock pads. They can help reduce injury risk from slips or falls, which is particularly valuable on an liftd rooftop space. Some shock pads are specifically engineered to meet playground safety standards.
Beyond safety, shock pads improve overall comfort by creating a softer, more natural feeling surface. Without proper cushioning, artificial grass on a hard roof deck can feel uncomfortably firm.
Air circulation is an often-overlooked benefit of quality underlayment systems. They create air gaps that help with drainage and prevent moisture buildup that could lead to odors or mold growth.
The drainage layer is absolutely critical for rooftop success. Systems like geocell grids create a network of channels that move water efficiently across the roof surface to existing drains. Look for drainage systems with high water channeling capacity – some can handle over half a gallon of water per square foot.
Lightweight materials are essential since every pound matters on a rooftop. Modern drainage grids achieve excellent performance while adding minimal weight to your roof structure. For example, some geocell systems weigh only about 3 pounds per 7 square feet while providing superior drainage.
The key is choosing components that work together as a system. Your artificial grass, shock pad, and drainage layer need to be compatible to ensure water moves freely through all layers without creating problems. This integrated approach is what separates successful rooftop installations from problematic ones.