Why Proper Drainage is Your Retaining Wall’s Lifeline
How to add drainage to a retaining wall involves installing a multi-layered system to manage water pressure and prevent structural failure. Here’s the quick answer:
- Excavate a trench behind the wall (minimum 12 inches wide).
- Install a perforated drain pipe at the base with a 1-2% slope.
- Backfill with 12+ inches of clean, angular gravel.
- Wrap the gravel zone with geotextile filter fabric.
- Add weep holes every 6-10 feet along the base course.
- Direct water away from the wall to a safe outlet.
Water is the number one enemy of retaining walls. Without proper drainage, it builds up behind your wall, creating immense hydrostatic pressure. This pressure can cause walls to lean, crack, bulge, or even collapse, leading to property damage.
The good news is that adding drainage—whether during construction or after—is the most effective way to protect your investment and ensure your wall stands strong for decades. Even a 2-foot retaining wall needs an effective drainage system. Nearly every retaining wall should have a footing drain at its foundation; the small added cost is well worth it to ensure the wall’s long-term performance.

The Unseen Threat: Why Your Retaining Wall is at Risk Without Proper Drainage
We often admire a retaining wall’s visible beauty, but its true strength lies in its unseen drainage system. Without it, your wall is constantly battling a powerful adversary: hydrostatic pressure.
When rain soaks the ground, the saturated soil expands and exerts immense pressure against the wall. This force can cause bulging, cracking, or complete structural failure, which is especially dangerous for walls over four feet tall. Proper drainage prevents this pressure buildup, protecting your investment, ensuring stability, and extending the wall’s lifespan. It also prevents soil erosion and keeps your landscape healthy.
Trapped water also undermines the soil’s strength as fine particles wash away, creating voids that can lead to collapse. In the worst cases, poor drainage becomes a hidden failure point, causing property damage and safety hazards. For more on preventing such issues, explore how a well-designed drainage system contributes to the Prevention of Wall Failure.
Warning Signs of Drainage Failure
Your retaining wall often sends distress signals when its drainage is failing. Recognizing these signs early can save you from costly repairs.
- Leaning or Bulging Walls: This is the most alarming sign. A wall leaning or bulging outwards is a clear indication that hydrostatic pressure is building up behind it.
- Cracks in the Wall Face: Horizontal cracks, stair-step cracks in block walls, or significant vertical cracks suggest that trapped water is creating pressure the structure can’t handle.
- Water Pooling at the Base: If water collects at the base of the wall or on the surface above, it means drainage is inadequate and the soil is becoming more saturated.
- Efflorescence (White Stains): These powdery white deposits on the wall surface are salts left behind as water seeps through and evaporates, indicating persistent moisture issues.
- Soil Erosion Above or Below the Wall: Soil washing away from the top of the wall or accumulating at its base points to uncontrolled water flow.
If you observe these signs, it’s time to investigate your wall’s drainage. Early intervention can prevent minor issues from becoming major failures. For more insights, consider information provided on Leaning Walls.
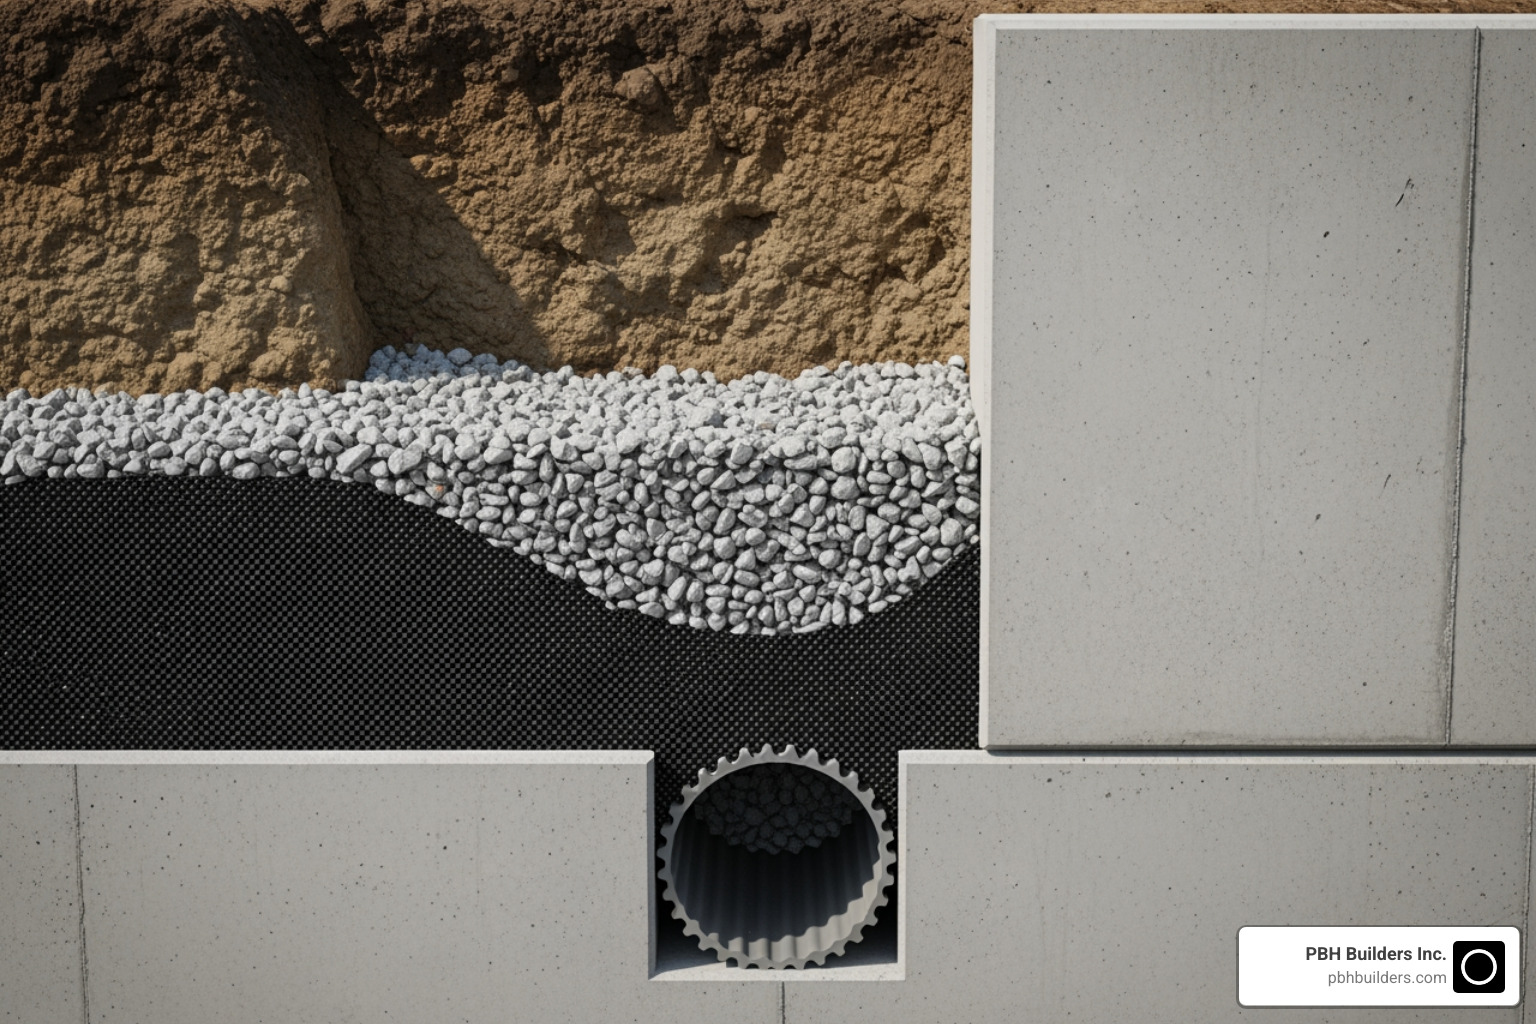
Anatomy of an Effective Drainage System
An effective retaining wall drainage system is a combination of elements working together to manage water and protect your wall.

This section details the essential parts of a reliable block retaining wall drainage system, which work in unison to control water flow and ensure long-term stability.
Key Components and Materials
Here are the critical players in any robust retaining wall drainage system:
- Gravel Backfill (Drainage Aggregate): Clean, angular gravel (like ¾” crushed stone) is placed behind the wall. It provides structural support while allowing water to drain freely. We recommend a gravel zone at least 12 inches wide—or 24 inches in areas with heavy rain like San Diego—and compacting it to prevent settlement.
- Perforated Drain Pipe: A 4-inch perforated drain pipe at the wall’s base collects water from the gravel and carries it away. It should be installed with a 1-2% downward slope toward an outlet and wrapped in filter fabric to prevent clogging.
- Geotextile Filter Fabric: This permeable fabric separates the gravel backfill from the surrounding soil. It lets water through but blocks fine soil particles, preventing the drain pipe and gravel from clogging. The fabric should wrap the entire drainage zone. You can find excellent options for filter fabric online.
- Weep Holes: These are small openings at the base of solid walls, typically spaced 6 to 10 feet apart. They allow trapped water to escape directly, relieving hydrostatic pressure.
Types of Drainage Systems
Different situations call for different drainage strategies:
- Footing Drains: This is the most common system, consisting of a perforated pipe in a gravel-filled trench at the wall’s base. It collects water and directs it to a safe outlet. Nearly every retaining wall should have one.
- French Drains: A French drain is a gravel-filled trench with a perforated pipe that is effective at intercepting surface and subsurface water before it reaches the wall, especially on slopes.
- Blanket and Chimney Drains: Used for challenging conditions like clay soils, these advanced systems use a vertical layer of gravel (“chimney”) behind the wall and a horizontal layer at the base (“blanket”) to capture and channel large amounts of water.
- Heel Drains: A heel drain is used with geogrid reinforcement to capture water behind the reinforced soil zone. It uses a separate pipe system and should not be connected to the main footing drain.
- Weep Holes: As mentioned, these openings in the wall face provide an immediate escape route for trapped water, working in tandem with the backfill and pipe system.
For a deeper dive into retaining walls and their various components, including drainage, we invite you to explore our custom retaining wall complete guide.
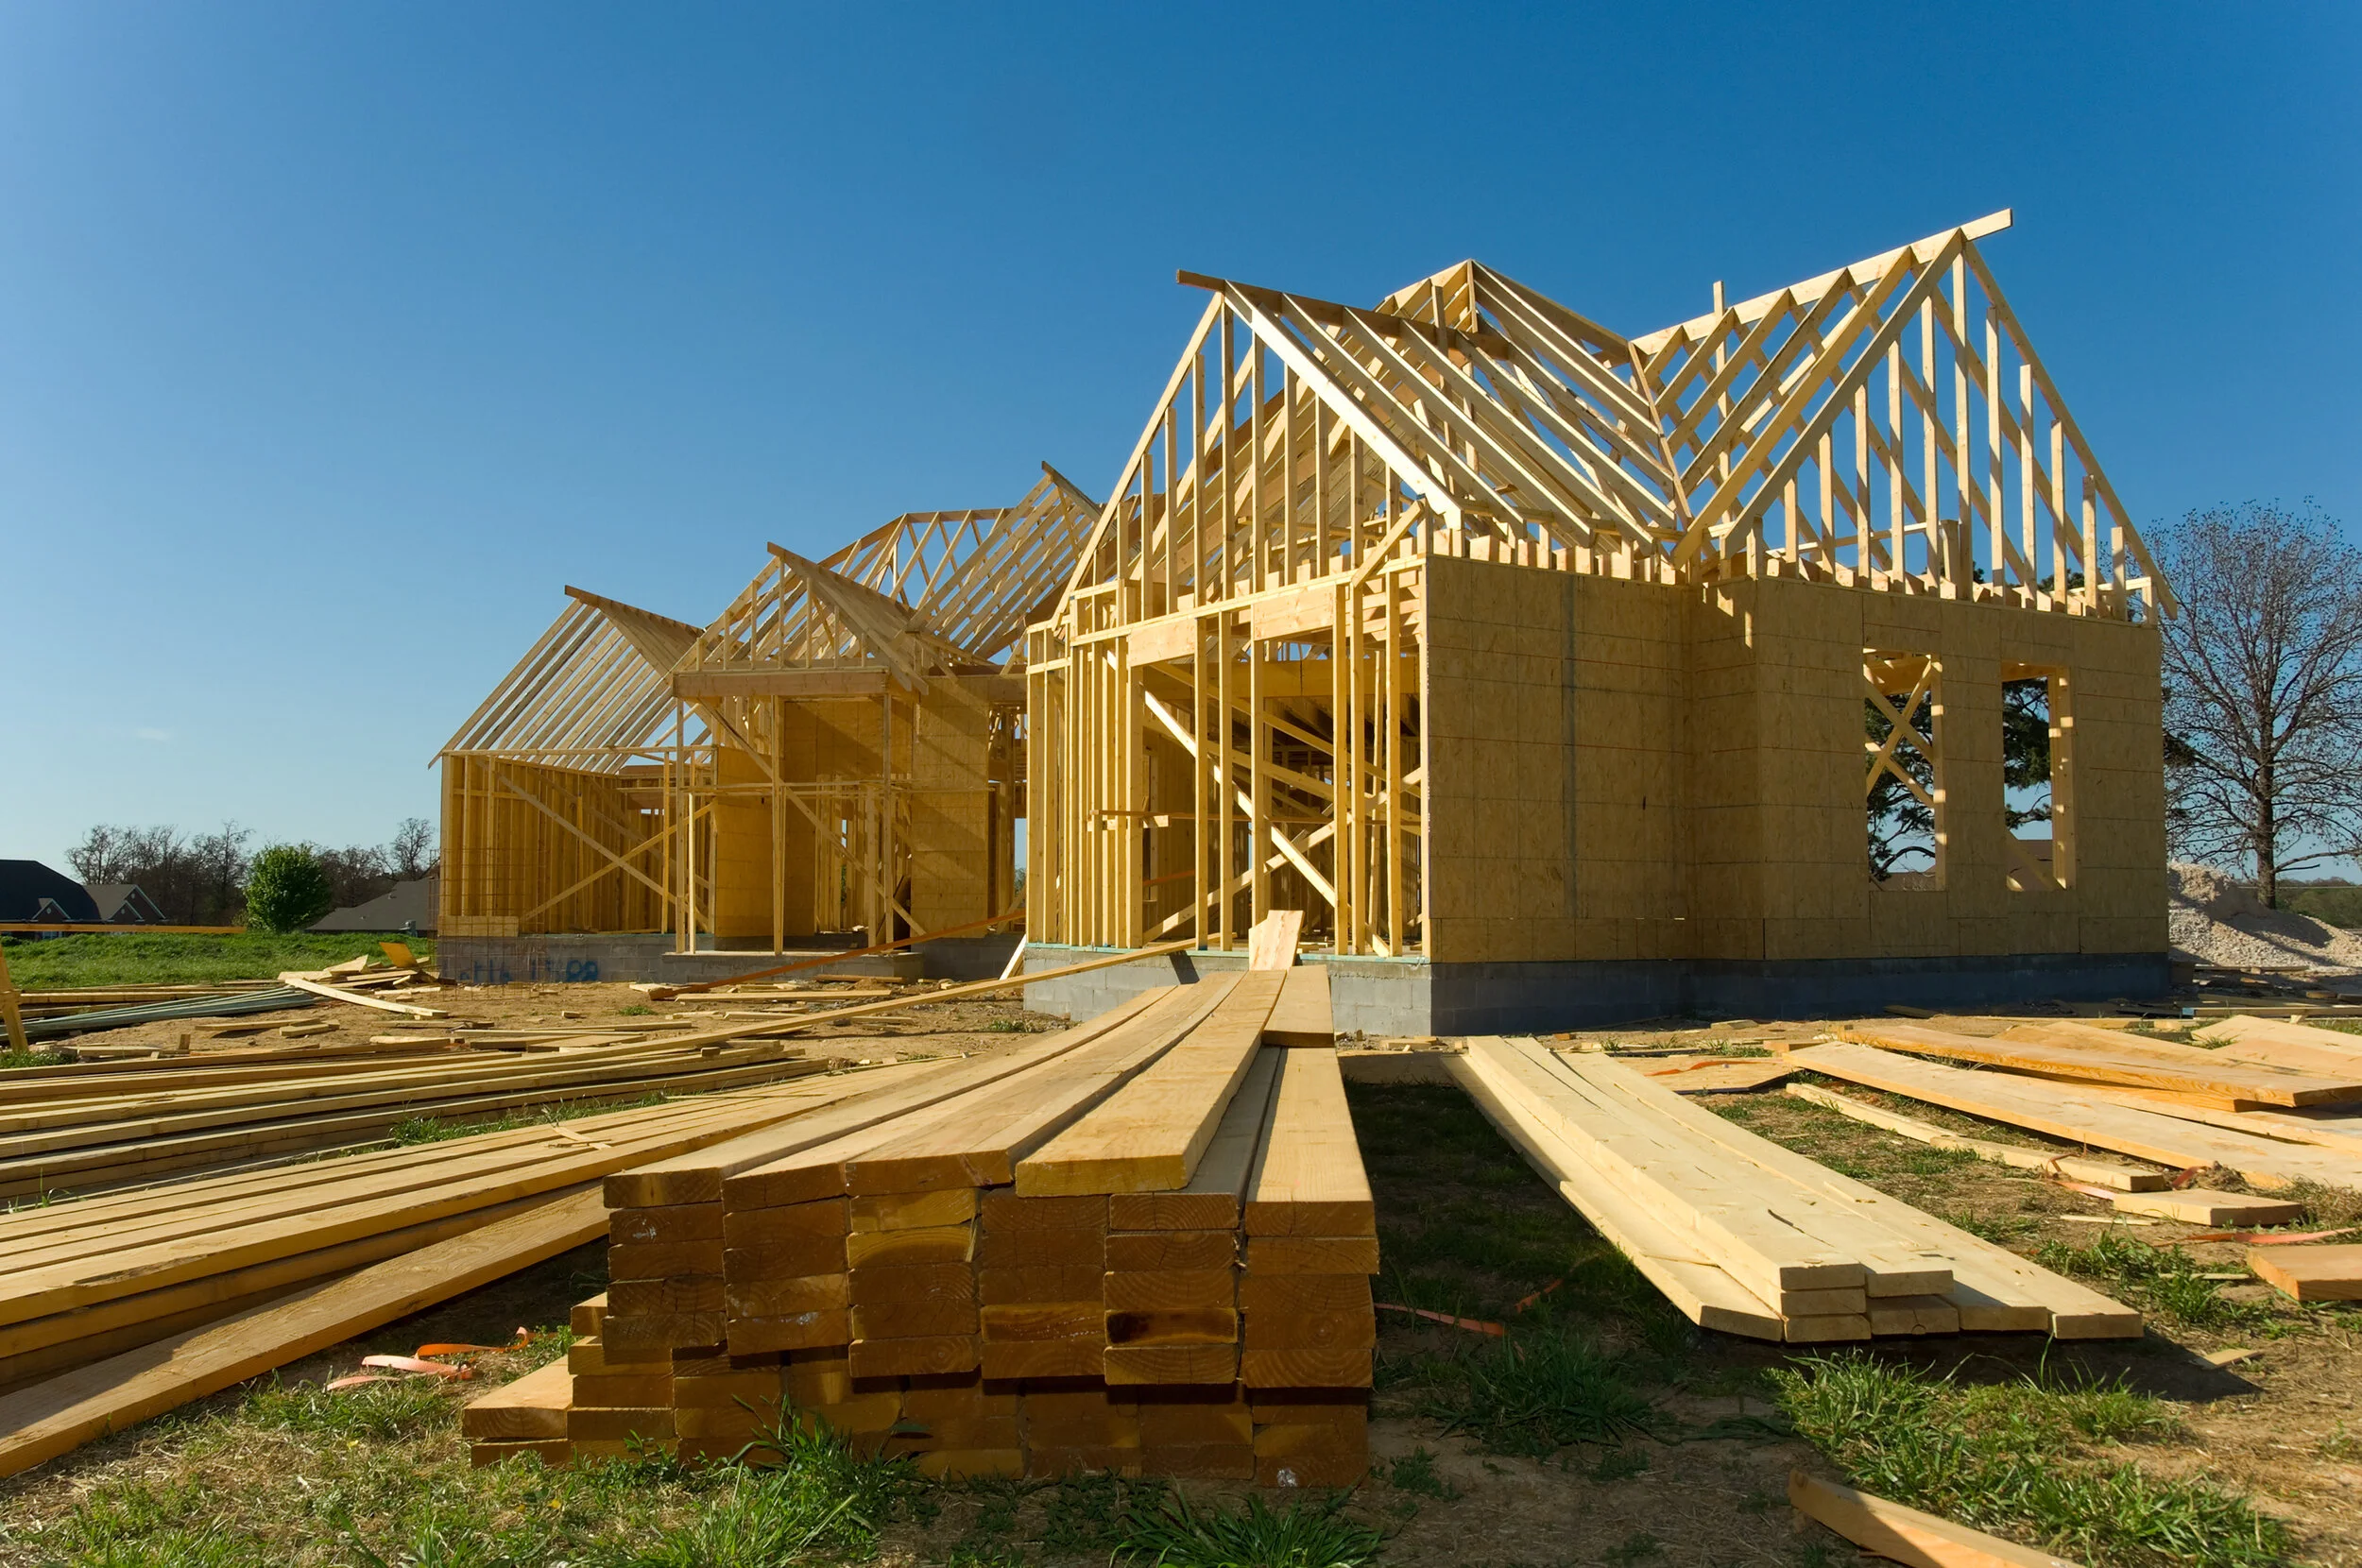
Step-by-Step Guide: How to Add Drainage to a Retaining Wall
Whether building a new wall or fixing an existing one, proper drainage is not the place to cut corners, as it directly impacts the wall’s longevity and safety.

How to Add Drainage to a Retaining Wall During Construction
Integrating drainage from the start is the most effective approach. Here’s how we ensure robust drainage during new construction:
- Excavating the Trench: Dig a trench behind the wall’s planned location, wide enough for the footing, drain pipe, and at least 12-24 inches of gravel backfill. The depth should reach the base of the footing.
- Laying the Base Course: Lay the first course of blocks on a prepared, level foundation. This base course must be stable, as it supports the entire wall.
- Installing the Perforated Pipe: This is a critical step for how to add drainage to a retaining wall. Place a 4-inch perforated drain pipe behind the first course of blocks with the holes facing down. The pipe must have a 1-2% downward slope toward an outlet and should be wrapped in filter fabric to prevent clogging.
- Ensuring Proper Slope and Outlets: Ensure the pipe has a clear outlet, either by “daylighting” it at a lower elevation or connecting it to a storm drain. Place outlets every 30-50 feet and cover them with a grate to keep pests out.
- Backfilling with Gravel and Filter Fabric: Fill the trench with at least 12 inches of clean, angular gravel, extending nearly to the top of the wall. Place geotextile filter fabric between the gravel and native soil, wrapping the gravel zone to prevent soil from clogging it.
- Compacting in Lifts: Compact the gravel and soil backfill in layers (“lifts”) to ensure stability. Grade the final soil surface to slope away from the wall to direct surface water.
These steps are vital for your wall’s long-term success. For more detailed advice, review these Tips for Adding Drainage To Your Retaining Wall.
How to Add Drainage to a Retaining Wall That’s Already Built
Adding drainage to an existing wall is more challenging but often necessary to prevent further damage. This process may be best left to professionals.
- Careful Excavation Behind the Wall: Carefully excavate a trench at least 12-18 inches wide behind the existing wall, down to its footing. This must be done with caution to avoid undermining the structure.
- Assessing Existing Backfill: Assess the existing backfill material. If it’s native soil, a new drainage system is necessary. Existing gravel may need to be replaced or augmented.
- Installing a New Drain Pipe and Gravel: Once the trench is open, install a new drainage system following the same principles as for new construction: line the trench with filter fabric, install a sloped perforated pipe, fill with clean gravel, and wrap the gravel with the fabric before backfilling with soil.
- Drilling Weep Holes: For solid walls, you can drill weep holes (spaced 6-10 feet apart) into the base course. This provides some pressure relief, but it’s most effective when there is a proper gravel drainage zone behind the wall for water to flow through.
Retrofitting drainage is complex. If your wall shows distress, consult with experienced professionals. Our team at PBH Builders Inc. has extensive experience with retaining wall projects in San Diego, CA, and can assess the best approach.
Advanced Considerations and Common Mistakes
Proper drainage requires understanding the local environment and avoiding common pitfalls. In San Diego, heavy rain and diverse soil types are major factors.
Heavy rainstorms can overwhelm an underbuilt system. Taller walls (over 6 feet) face greater pressure and require a formal engineering design. Soil type is also critical: clay soils retain water and need aggressive drainage, while sandy soils can erode easily. Unstable organic soils must always be replaced.
For insights into different retaining wall materials, you might find our guide on wood retaining wall contractors near me helpful.
Drainage for Different Wall Types
The best drainage solution varies by wall material:
- Segmental Block Walls: Built from interlocking blocks, these walls have joints that let some water pass. However, a full drainage system (gravel, pipe, fabric) is still essential to manage pressure. Never use grout between blocks.
- Poured Concrete Walls: Since concrete is impervious, a robust drainage system is essential. These walls require gravel backfill, a drain pipe, and weep holes to relieve hydrostatic pressure.
- Wood Retaining Walls: Wood can rot if constantly wet. Use pressure-treated wood and a proper drainage system. Lightweight pea gravel is a good backfill choice as it allows free water flow while minimizing pressure.
- Stone Walls: Like concrete walls, natural stone walls are mostly impervious and require a complete drainage system with gravel, a pipe, and weep holes.
For more on how materials affect design, check out our driveway retaining wall ultimate guide.
Common Mistakes to Avoid
Avoiding these common mistakes is crucial for the long-term stability of your retaining wall:
- Using Wrong Backfill Material: Using native soil (especially clay) instead of clean gravel for backfill is a critical error. Soil retains water, increasing hydrostatic pressure and clogging the drainage system.
- Forgetting Filter Fabric: Skipping the geotextile filter fabric allows soil to clog the gravel and pipe, rendering the entire drainage system useless over time.
- Improper Pipe Slope: A pipe without a proper downward slope won’t drain. Water will pool inside, creating blockages and adding pressure behind the wall.
- No Clear Outlet: The drain pipe is useless without a clear outlet. Water must be directed safely away from the wall’s foundation to prevent saturation and pressure.
- Ignoring Surface Water Runoff: A drainage system can be overwhelmed by surface water. Ensure the ground is graded to slope away from the wall, and divert runoff from roofs and sprinklers.
Investing in proper drainage from the start is always more cost-effective than dealing with repairs later.
Frequently Asked Questions about Retaining Wall Drainage
We often get a lot of questions about retaining wall drainage, and for good reason—it’s a critical aspect of any successful retaining wall project. Here are answers to some of the most common inquiries we receive:
Does a 2-foot retaining wall need drainage?
Yes, absolutely! While it might seem like a small wall wouldn’t pose much risk, even a 2-foot retaining wall needs an effective drainage system. Without it, water can still build up behind the wall, leading to hydrostatic pressure that might cause the wall to lean or even collapse. All walls need systems to manage water effectively, preventing damage over time. A simple solution like a perforated pipe and gravel backfill can make a huge difference in maintaining the wall’s integrity. The increased cost of a footing drain is small compared to assuring the wall will perform over the long run.
How deep should the gravel backfill be?
When it comes to retaining wall drainage, depth matters. It’s recommended to have at least 12 inches of clean, angular gravel behind the wall. This gravel layer acts as a filter, allowing water to pass through while keeping soil in place. However, we often recommend “the more the better,” suggesting 24 inches of gravel backfill, especially in areas with poor draining soils (like clay) or where heavy rainfall is common in San Diego. The gravel should be clean, angular, and compacted to ensure optimal drainage and structural support. This generous gravel zone creates a clear, unobstructed path for water to reach the drain pipe effectively.
Can I just drill weep holes in my existing wall?
Yes, you can add weep holes retroactively by drilling them into an existing concrete, stone, or brick wall. This can be a straightforward fix for minor drainage issues and helps relieve hydrostatic pressure by allowing trapped water to escape. However, it’s important to understand their limitations. Weep holes are most effective when there is a gravel drainage zone behind the wall for water to travel through. If your existing wall was backfilled only with native soil, the effectiveness of weep holes will be limited, as the water may not be able to easily reach the holes through dense soil. While they can provide some relief, a comprehensive solution for a wall with poor backfill might require more extensive work, such as excavating behind the wall to install a proper drainage system.
Ensure Your Wall’s Longevity with Professional Drainage Solutions
As we’ve explored, proper drainage is not just an optional add-on; it’s a non-negotiable, fundamental requirement for the health, stability, and longevity of any retaining wall. It’s the critical safeguard that protects your investment, prevents costly repairs, and ensures your landscape remains safe and beautiful for years to come.
From preventing the silent threat of hydrostatic pressure to mitigating the visible signs of wall failure, a well-designed and properly installed drainage system is truly your retaining wall’s lifeline. We understand the unique soil conditions and rainfall patterns here in San Diego, CA, and tailor our drainage solutions accordingly.
For expert assessment, design, and installation of durable retaining walls and their essential drainage systems in the San Diego area, including Chula Vista, Oceanside, Escondido, Carlsbad, Vista, San Marcos, Encinitas, La Mesa, Santee, National City, Poway, Imperial Beach, and Coronado, trust the professionals at PBH Builders Inc. We’re here to help you get the job done right, ensuring your retaining wall stands strong against the elements for decades to come.