Understanding Your Wood Retaining Wall
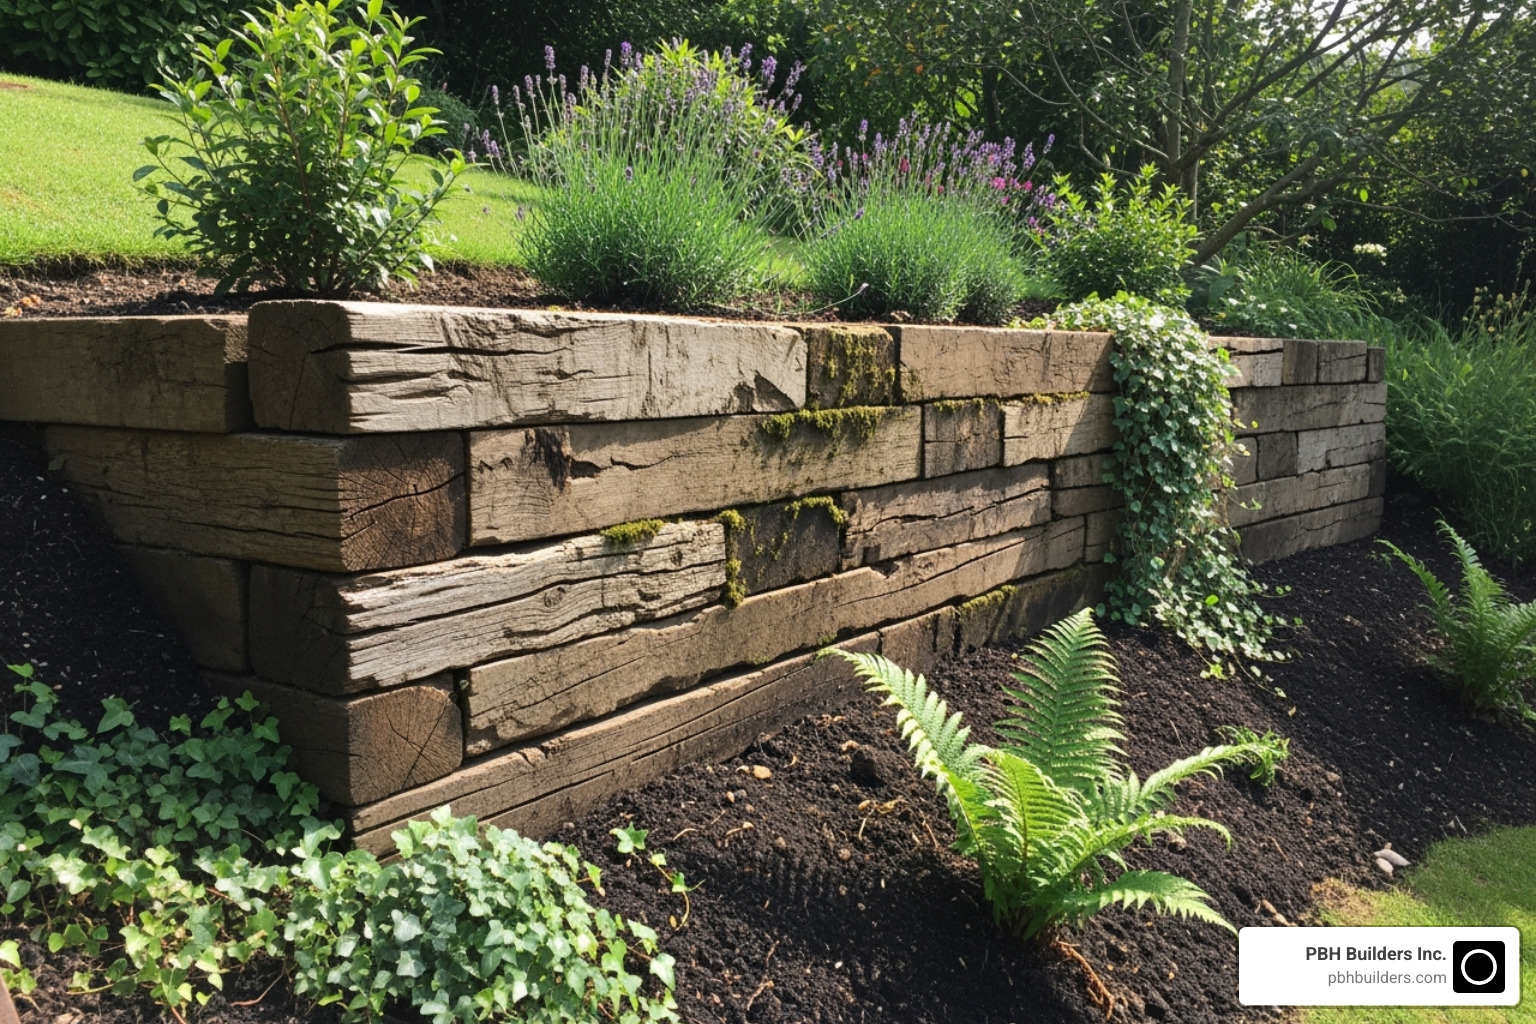
A wood retaining wall is a structure built to hold back soil and prevent erosion on sloped landscapes. It’s a popular choice for homeowners, offering a natural look that blends beautifully with outdoor spaces.
Thinking about a wood retaining wall for your property? Here’s a quick rundown of what they are and why they’re so often used:
- Purpose: They control soil erosion, create flat, usable areas on slopes, and can add visual appeal to your yard.
- Materials: Typically built using pressure-treated lumber (like pine or fir), cedar, redwood, or sometimes even juniper timbers.
- Aesthetics: Offers a warm, organic aesthetic that complements natural surroundings, often preferred over concrete or stone for its natural charm.
- Cost & DIY: Generally more affordable than other materials and often a feasible DIY project for those with some building experience.
These walls are excellent for shaping your landscape, making uneven ground functional, and protecting your property.

Why Choose Wood for Your Retaining Wall?
When choosing a material for your retaining wall, wood is a compelling option. It brings a warm, organic look to your yard that concrete or stone can’t always match, making any landscape feel more welcoming and natural.
Advantages of Timber
A wood retaining wall blends beautifully into your landscape. Unlike the uniform appearance of concrete, wood’s natural variations in color and texture complement gardens and outdoor spaces. It can create a seamless visual connection between your house and yard.
Wood is also a budget-friendly choice, typically costing less upfront than concrete or stone. This makes it an excellent option for homeowners who want to tackle the project themselves.
As a DIY-friendly material, wood is lightweight and easy to handle without specialized equipment. Most lumber yards carry everything you need, simplifying the material sourcing process.
Installation is also much faster. A timber wall can often be completed in a weekend, whereas a concrete wall might take days to cure. The straightforward construction means less time on complex techniques and more time enjoying your finished project.
Disadvantages and Considerations
Wood does have limitations. The primary consideration is lifespan. A well-built wood retaining wall typically lasts 10-25 years, which is shorter than concrete or stone walls that can last 50-100 years or more.
Wood is also susceptible to rot, decay, and pests, especially given its constant contact with soil moisture. Using properly treated lumber and ensuring good drainage are essential to extending your wall’s life.
There are also height limitations. Wood is ideal for walls up to 4 feet tall. Taller structures require professional engineering to handle the increased soil pressure.
For those growing edibles nearby, consider potential chemical leaching from treated lumber. While modern treatments are safer, naturally rot-resistant woods like cedar or redwood are a better choice for garden applications.
Here’s how wood stacks up against other popular materials:
| Material | Cost (Initial) | Lifespan (Years) | Aesthetics | Installation Difficulty |
|---|---|---|---|---|
| Wood | Low | 10-25 | Natural, rustic | DIY-friendly (lower walls) |
| Concrete Blocks | Medium | 50-100 | Structured, versatile | Medium |
| Poured Concrete | Medium-High | 50-100+ | Modern, customizable | High (professional typically) |
| Natural Stone | High | 100+ | Organic, premium | High (professional recommended) |
Wood offers a great combination of natural beauty, affordability, and accessibility. Just be sure to understand the maintenance requirements and choose the right wood for your project.
Planning and Designing Your Project
Proper planning is the difference between a wood retaining wall that lasts for decades and one that fails. Before you start, it’s crucial to assess your site and understand local regulations to avoid common pitfalls.
Your soil type dictates much of the build. Sandy soil drains well but may need deeper post holes for stability. Clay soil retains water, requiring extra drainage to prevent pressure on the wall. Rocky soil can make digging post holes challenging.
The slope angle is also critical. A gentle slope puts minimal pressure on the wall, while a steep grade may require a tiered approach with multiple shorter walls instead of one tall one.
Before finalizing your design, create a realistic budget. Wood retaining walls are cost-effective, but quality lumber, drainage materials, and tool rentals can add up.
Always check your local building codes. Many areas, like Fairfax County, require permits for retaining walls over a certain height, often 3 or 4 feet. Reviewing when a permit is required before you build can save you a major headache.
Wood offers great design flexibility, from simple, straight walls to complex tiered systems that transform a slope into terraced levels. Adding steps into your wood retaining wall design is a fantastic way to improve both function and visual appeal. For inspiration on how a retaining wall can fit into a larger landscape vision, see more info about our Landscape Design services.
Choosing the Right Materials for Your Wood Retaining Wall
Let’s break down your lumber options to help you make the right choice.
Pressure-treated pine or fir is the workhorse of retaining walls. It’s affordable, widely available, and can last 15-20 years. Look for lumber with a ground-contact rating of .40 or higher for maximum durability. Modern treatments are much safer than older versions. For code compliance guidance, the American Wood Protection Association provides helpful information: Information for Building Code Officials: How do I make sure the treated wood on the jobsite meets code?.
Cedar and redwood are premium, naturally rot- and insect-resistant options. They are ideal near vegetable gardens where you want to avoid chemical treatments, but they come at a higher upfront cost.
Juniper is another excellent choice, with research showing it can last 30+ years in ground contact. It’s naturally decay-resistant, non-toxic, and often more affordable than cedar or redwood.
We strongly recommend avoiding railroad ties. While durable, they are typically treated with creosote, a toxic substance that can leach into your soil and pose health risks.
Essential Tools and Materials

Having the right tools and materials on hand will make your project run smoothly.
Tools:
- Circular saw or miter saw for clean cuts.
- Drill/driver with backup batteries.
- Level (both long and short).
- Shovel and post-hole digger.
- Sledgehammer for driving spikes.
- Tape measure.
- Tamp or compactor for gravel and soil.
- Safety gear: gloves and safety glasses.
Materials:
- Lumber: Typically 6×6 posts and 2×6 or 2×8 planks, or solid timbers (cedar, redwood, juniper).
- Gravel: Three-quarter-inch crushed gravel for drainage.
- Drainage: 4-inch perforated drain pipe and landscape fabric.
- Fasteners: Half-inch rebar spikes (42-inch), 10-inch landscape spikes, and heavy-duty outdoor screws or galvanized nails.
- Concrete mix for posts.
- Wood preservative for all cut ends of treated lumber.
Step-by-Step Guide to Building a Wood Retaining Wall
Building a wood retaining wall is a rewarding DIY project. Before starting, prioritize safety with gloves, safety glasses, and sturdy work boots. While a 16-foot wall might only take 3 hours of building time, plan for a full weekend to allow for concrete setting and proper execution.
A DIY approach can save you roughly half the cost of professional installation. Materials for a 16-foot wall may run $250 to $500, while professional installation typically costs $15 to $30 per square foot. For complex designs or walls over 4 feet, hiring a professional is the smarter move. Homeowners in San Diego can see examples of our expert work here: More info about our Retaining Walls services.
Step 1: Site Preparation and Excavation
A solid foundation is key to a long-lasting wall.
First, mark your layout with stakes and string, using a measuring tape for accuracy. Then, clear all vegetation, including plants, roots, and rocks from the area.
Next, dig a trench about 6-8 inches deep and wide enough for your first course of timbers.
Use a level to establish a level base. An uneven base will cause problems as you build. Add a 2-inch layer of gravel to the trench and compact it firmly with a tamper.
For walls over 30 inches, dig post holes every 5 feet. The depth should equal the height of the retained soil, plus an extra 4-6 inches for gravel and concrete. For a 24-inch high wall, dig 28-inch deep holes with a 12-inch diameter.
Step 2: Installing Posts and the First Course
This is where your wood retaining wall starts to take shape.
Set your posts in concrete by placing them in the prepared holes. Use a level to ensure each post is perfectly plumb (vertical) and aligned, bracing them with scrap wood to hold them steady. Pour fast-setting concrete into the holes, following the manufacturer’s instructions. Allow at least 4 hours for the concrete to set before applying weight.
A crucial step is to apply wood preservative to all cut ends of pressure-treated lumber. This protects the exposed, untreated interior from premature rot.
Lay the first course of timbers in the leveled trench on the compacted gravel base. Use your level to ensure this course is perfectly flat, as it sets the stage for the rest of the wall.
Secure the base by driving 42-inch lengths of 1/2-inch rebar through pre-drilled holes in the first course and into the ground. Place these stakes about 6-12 inches from each end and every 4 feet along the timber to anchor the wall.
Step 3: Building Up and Adding Drainage
Proper drainage is essential for the wall’s stability and longevity.

As you add each new course, stagger the joints by at least 4 inches from the course below to distribute stress and increase strength.
Attach each course to the one below using 10-inch landscape spikes or heavy-duty outdoor screws. For added stability, create a slight backward lean by setting each upper timber back about 1/2 inch from the one below it.
As you build, backfill with 3/4-inch crushed gravel in the space behind the wall. This prevents hydrostatic pressure by allowing water to drain freely. Compact the gravel in layers.
After a few courses, lay a 4-inch perforated drain pipe on the gravel at the back of the wall. Slope the pipe slightly (about 1 inch every 4 feet) toward an outlet where water can escape.
Wrap the gravel and pipe with landscape fabric to prevent soil from clogging the drainage system.
For walls taller than 30-48 inches, install “deadman” anchors—T-shaped timber assemblies extending into the hillside. These are typically installed at 4-foot intervals on every other course to anchor the wall against soil pressure.
Step 4: Finishing Touches
These final steps give your wall a professional look.
Cap the wall with wider timbers or decorative caps to protect the top course from weather and provide a finished appearance.
Backfill with topsoil behind the wall, leaving about 6 inches of space from the top to account for settling.
Grade the surrounding area to direct water flow away from the wall structure.
Finally, plant groundcovers or shrubs on the slope to help control erosion and further stabilize the soil behind your wood retaining wall.
Lifespan and Maintenance
Your wood retaining wall is an investment that, with proper care, can serve you well for many years. Most timber walls have a typical lifespan of 10 to 25 years, though we’ve seen some exceptional examples last much longer. The secret? Quality materials, solid construction, and a little TLC along the way.
Several key factors determine how long your wall will stand strong. Climate plays a huge role – if you live in an area with heavy rainfall, extreme temperature swings, or high humidity, your wood will face more challenges. But don’t worry, proper planning can handle these conditions.
Wood quality makes all the difference. Using lumber with the right ground-contact rating (that .40 or higher we mentioned earlier) and treating every cut end you make significantly extends your wall’s life. Natural champions like cedar, redwood, or juniper bring their own built-in resistance to rot and pests.
Perhaps most importantly, installation quality sets the foundation for longevity. A wall with proper drainage, secure anchoring, and careful construction will outlast a hastily built one every time. Think of it this way – you wouldn’t build a house on a shaky foundation, and the same principle applies here.
Want to see what quality construction looks like? Check out our portfolio at More info about our Retaining Wall projects for examples of walls designed to last.
Essential Maintenance for Your Wood Retaining Wall
Maintaining your wood retaining wall is straightforward and ensures its strength and beauty for years.
- Annual Inspections: Each spring or fall, walk around your wall and look for any signs of shifting, bulging, or wood deterioration, especially near the base.
- Check for Rot: Gently probe damp areas with a screwdriver. Soft spots indicate rot. Address any bulging immediately, as it signals excessive pressure behind the wall.
- Keep it Clean: Clear away leaves, soil, and debris that trap moisture against the wood.
- Reseal the Wood: Every few years, reapply a wood preservative or sealant to exposed surfaces, particularly the tops of posts and timbers.
- Ensure Drainage is Clear: This is the most critical task. Periodically check that your drain pipe outlet is clear of debris so water can flow freely away from the wall. A blocked drain is the primary cause of wall failure.
Frequently Asked Questions about Wood Retaining Walls
Here are answers to the most common questions we hear from homeowners about building a wood retaining wall.
How high can you build a wood retaining wall?
For safety and stability, DIY wood retaining walls should generally be kept under 4 feet tall. Beyond that height, the soil pressure increases significantly, requiring professional engineering.
An engineer will design the proper reinforcements, such as “deadman” anchors and tie-backs, which extend deep into the hillside to provide necessary stability for taller walls.
Always check your local building codes, as many jurisdictions require permits for walls over a certain height.
How much does a wood retaining wall cost?
The cost depends on whether you build it yourself or hire a professional.
Professional installation typically costs $15 to $30 per square foot. For a 16-foot long, 4-foot high wall, this would be roughly $960 to $1,920.
The DIY route can cut your costs in half, as you are only paying for materials. A 16-foot wall might cost $250 to $500 in materials, including lumber, gravel, hardware, and concrete.
How do you stop a wood retaining wall from rotting?
Preventing rot is crucial for a wood retaining wall’s longevity and involves three key strategies.
- Proper Drainage: This is the most important factor. A gravel backfill and a perforated drain pipe system are essential to channel water away from the wood.
- Use the Right Lumber: Always use ground-contact rated treated lumber (.40 or higher) that is specifically designed to resist rot and insects.
- Seal All Cuts: When you cut pressure-treated lumber, the interior is exposed. Apply a wood preservative to all fresh cuts to maintain a protective barrier. For more information on treated wood standards, visit the American Wood Protection Association.
For extra protection in very wet climates, you can also apply a waterproofing membrane to the back of the wall before backfilling.
Conclusion
Building a wood retaining wall can be one of the most rewarding home improvement projects you’ll tackle. There’s something deeply satisfying about changing a sloped, unusable yard into terraced, functional space that looks like it belongs in a magazine.
Throughout this guide, we’ve explored why wood makes such an appealing choice – its natural beauty, affordability, and DIY-friendly nature make it accessible to most homeowners. We’ve also been honest about its limitations, like the shorter lifespan compared to stone or concrete and the need for ongoing maintenance.
The key takeaways? Proper planning is everything. Taking time to assess your soil, understand your local building codes, and choose the right materials will save you headaches down the road. Drainage isn’t optional – it’s the difference between a wall that lasts 10 years and one that fails after the first heavy rain season.
For walls under 4 feet, a weekend DIY project can save you significant money while giving you that pride of accomplishment. But let’s be real – taller walls, complex designs, or situations where you’re just not comfortable with the engineering requirements call for professional help.
If you’re in San Diego and want the peace of mind that comes with expert craftsmanship, PBH Builders Inc. specializes in creating durable and beautiful hardscaping solutions. We understand that every property is unique, and we’ll work with you to design a wood retaining wall that not only solves your slope challenges but improves your entire outdoor living space.
Ready to transform your landscape? Contact us for your retaining wall project and let’s turn your vision into reality. After all, your outdoor space should work as hard as you do – and look great doing it!